

قسمت دوم آموزش ساخت ملاقه پاستا
ملاقه پاستا در سالیدورک


قسمت دوم آموزش ساخت ملاقه پاستا


این کتاب آموزشی شامل 6 قطعه اصلی و دو مجموعه مونتاژی می باشد که هر یک بطور کامل آموزش داده شده است. در این کتاب آموزشی، طراحی و مونتاژ موتور 4 سیلندر به صورت گام به گام (همراه با توضیحات کافی و تصاویر متعدد از مراحل کار) در 148 صفحه، در 8 بخش، به زبان فارسی به ترتیب زیر به کاربر آموزش داده می شود:
بخش 1: طراحی و مدلسازی میل لنگ (Crank Shaft)
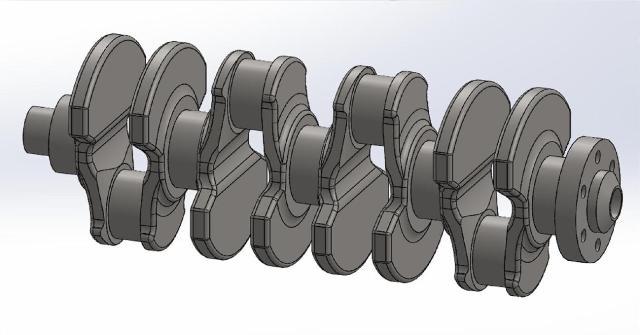
بخش 2: طراحی و مدلسازی گژن پین (Gudgeon Pin)
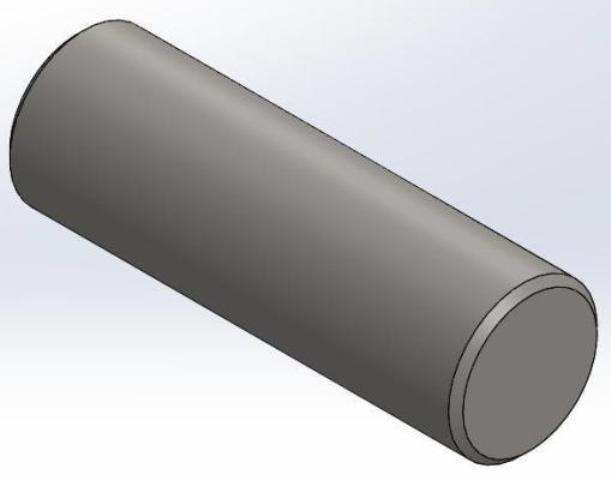
بخش 3: طراحی و مدلسازی شاتون (Connecting Rod)
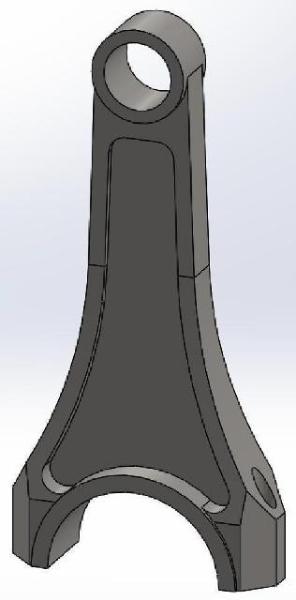
بخش 4: طراحی و مدلسازی درپوش یاتاقان (Bearing Cap)
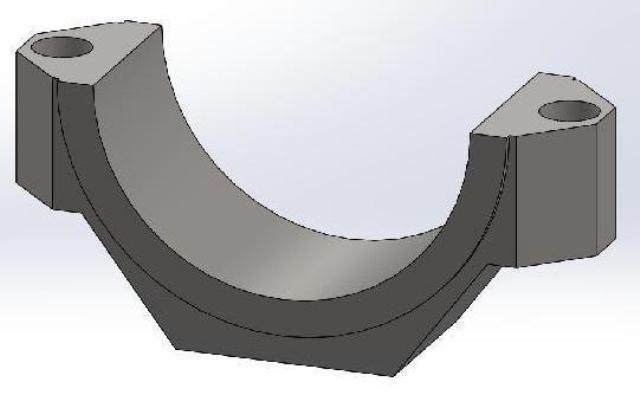
بخش 5: طراحی و مدلسازی بوش میل لنگ (Crank Shaft Bush)
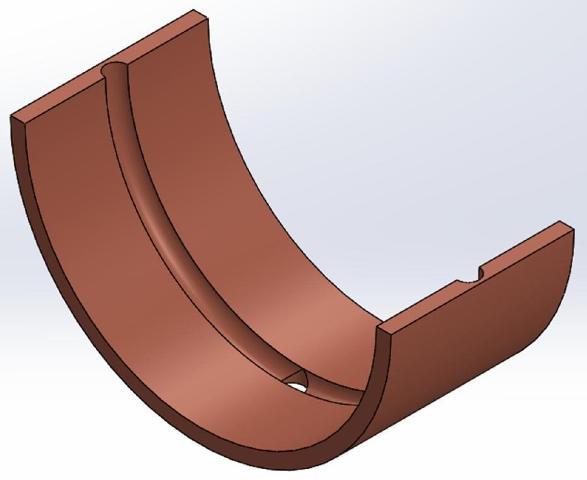
بخش 6: طراحی و مدلسازی پیستون (Piston)
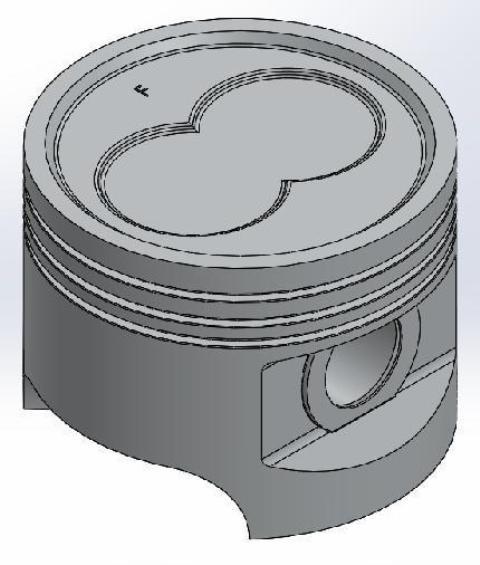
بخش 7: مونتاژ مجموعه پیستون (Piston Assembly)
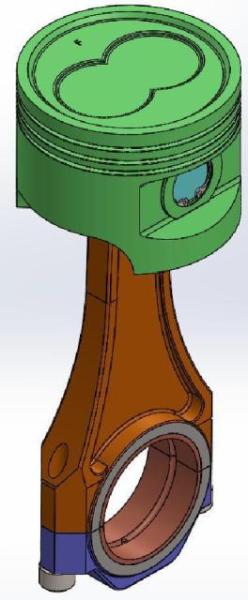
بخش 8: مونتاژ موتور 4 سیلندر
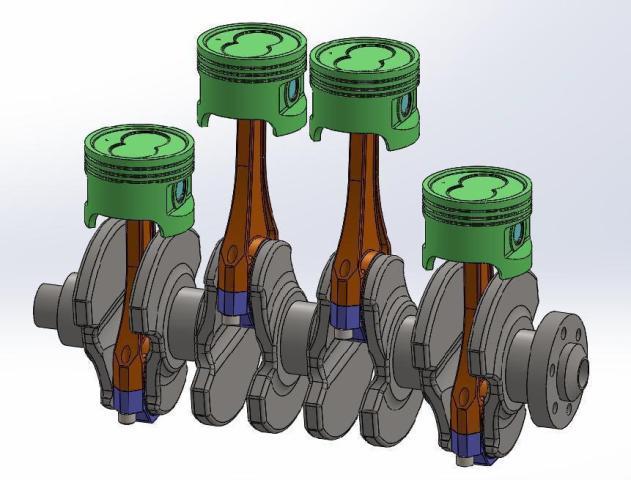
جهت خرید آموزش طراحی و مونتاژ موتور 4 سیلندر در نرم افزار SolidWorks به زبان فارسی به مبلغ استثنایی فقط 4000 تومان و دانلود آن بر لینک پرداخت و دانلود در پنجره زیر کلیک نمایید.
!!لطفا قبل از خرید از فرشگاه اینترنتی کتیا طراح برتر قیمت محصولات ما را با سایر محصولات مشابه و فروشگاه ها مقایسه نمایید!!
!!!تخفیف ویژه برای کاربران ویژه!!!
با خرید حداقل 10000 (ده هزارتومان) از محصولات فروشگاه اینترنتی کتیا طراح برتر برای شما کد تخفیف ارسال خواهد شد. با داشتن این کد از این پس می توانید سایر محصولات فروشگاه را با 20% تخفیف خریداری نمایید. کافی است پس از انجام 10000 تومان خرید موفق عبارت درخواست کد تخفیف و ایمیل که موقع خرید ثبت نمودید را به شماره موبایل 09365876274 ارسال نمایید. همکاران ما پس از بررسی درخواست، کد تخفیف را به شماره شما پیامک خواهند نمود.


نسخه 2016 SolidWorks شاهد تغییرات عمده ای بوده و همچنین شاهد این هستیم که بهبودهای متعددی جهت سهولت کار با این نرم افزار صورت گرفته است. گوشه ای از توانمندی های نرم افزار SolidWorks 2016 به شرح زیر می باشد:
*** در این نسخه از نرم افزار امکان باز کردن فایلهای STL پیچیده تر نسبت به گذشته با گزینه Solid و Surface وجود دارد (تا 500000 facets).
*** توسط دستور PhotoView 360 Scene Illumination Proof Sheet هنگام رندرینگ می توان در یک نگاه تاثیر تغییرات مختلف نور در محیط را بر رندرینگ نهایی دید و با استناد به آن عددهای درست برای تنظیم نور را انتخاب نمود.
*** در SolidWorks 2016 امکان منحنی C2 به Edge Fillet افزوده شده است. در نسخه قبلی این امکان تنها برای Face Fillet وجود داشت.
*** هم اکنون می توانید در هر نقطه ای از سطح یک صفحه مرجع موازی با نمای دید بسازید. برای این کار تنها لازم است در هر نقطه از سطح کلیک راست و گزینه Create Plane Parallel to screen را انتخاب نمایید.
*** در محل انتخاب شده یک 3D Sketch Point و یک Plane ایجاد می شود. می توانید 3D Sketch Point را نسبت به قطعه اندازه گذاری نمایید.
*** با استفاده از گزینه Circular Profile دیگر نیازی به رسم Sketch برای مقطع دایروی نبوده و تنها با انتخاب یک Edge از قطعه و تعیین قطر می توان Sweep را ایجاد نمود.
*** با استفاده از گزینه Equal Curve می توان طول یک خط و یا دایره در Sketch را برابر طول یک منحنی تعریف کرد.
*** بالاخره قابلیت Instant 3D به محیط Sketch وارد شد. اکنون با استفاده از Instant 2D می توانید ابعاد مورد نظر را با حرکت پوینتر ماوس تغییر دهید.

کتاب یادگیری به همراه تمرین SolidWorks 2016 , Learn by doing-Part 1، یکی از کتاب های مرجع، مفید و کاربردی در زمینه آموزش طراحی با نرم افزار سالیدورکس 2016 می باشد. این کتاب مشتمل بر 278 صفحه، به زبان انگلیسی روان، تایپ شده، به همراه کلی تصاویر رنگی، با فرمت PDF، به ترتیب زیر گردآوری شده است:
Chapter 1: Getting Started
Starting SolidWorks
User Interface
Quick Access Toolbar
Menu
Command Manager
Features tab
Evaluate tab
Sketch tab
Assemble tab
Drawing Environment tabs
Sheet Metal tab
Feature Manager Design Tree
Status bar
View (Heads Up) Toolbar
Shortcut Menus
Property Manager
Breadcrumbs
Mouse Functions
Customizing the Command Manager, Shortcut Bars, and Menus
Chapter 2: Modeling Basics
TUTORIAL 1
Opening a New Part File
Starting a Sketch
Adding Dimensions
Constructing the Base Feature
Adding an Extruded Feature
Adding another Extruded Feature
Saving the Part
TUTORIAL 2
Opening a New Part File
Sketching a Revolve Profile
Constructing the Revolved Boss
Constructing the Cut feature
Constructing another Cut feature
Adding a Fillet
Saving the Part
TUTORIAL 3
Opening a New Part File
Constructing the Cylindrical Feature
Constructing Cut feature
Saving the Part
TUTORIAL 4
Applying Draft
Saving the Part
Chapter 3: Assembly Basics
TUTORIAL 1
Opening a New Assembly File
Inserting the Base Component
Adding the second component
Applying Mates
Adding the Third Component
Checking the Interference
Saving the Assembly
Starting the Main assembly
Adding Disc to the Assembly
Placing the Sub-assembly
Adding Constraints
Placing the second instance of the Sub-assembly
Saving the Assembly
TUTORIAL 2
Creating the Exploded View
Creating Explode lines
Chapter 4: Creating Drawings
TUTORIAL 1
Opening a New Drawing File
Generating the Base View
Creating the Section View
Creating the Detailed View
Creating the Centerline
Specifying Dimension Settings
Retrieving Dimensions
Adding additional dimensions
Saving the Drawing
TUTORIAL 2
Creating a Custom Sheet Format
Starting a New drawing
Generating the Drawing Views
TUTORIAL 3
Creating the Isometric View
Generating the Exploded View
Creating the Bill of Materials
Creating Balloons
Chapter 5: Sketching
Creating Rectangles
Creating Polygons
Relations
Merge
Horizontal
Vertical
Tangent
Parallel
Perpendicular
Midpoint
Automatic Relations
Deleting Relations
Hiding Relations
Sketch Numeric Input
Replace Entity
Make Path
Path Length Dimension
Convert Entities
Midpoint line, Perimeter Circle, and Sketch Xpert
Ellipses
Partial Ellipse
Conic
Move and Rotate Entities
Rotate Entities
Copy Entities
Scale Entities
Trim Entities
Extend Entities
Offset Entities
TUTORIAL 1
Sketch Fillet
Sketch Chamfer
Mirror Entities
Stretch Entities
Circular Sketch Pattern
3D Sketch
Chapter 6: Additional Modeling Tools
TUTORIAL 1
Constructing the Helix
Adding the Reference Plane
Constructing the Sweep feature
TUTORIAL 2
Constructing a Revolved Cut
Constructing a Mirror Feature
TUTORIAL 3
Creating Sections and Guide curves
Creating another section
Constructing the swept feature
Constructing the Extruded feature
Adding Fillets
Shelling the Model
Adding the Indent feature
Adding Threads
TUTORIAL 4
Constructing a cylindrical shell
Adding a Slot
Constructing the Axis
Constructing the Linear pattern
Constructing the Circular pattern
TUTORIAL 5
Constructing the first feature
Constructing the Second Feature
Constructing the third feature
Inserting Holes
Adding Chamfers
TUTORIAL 6
Constructing the first feature
Constructing the Extruded cut
Making the Curve Driven Pattern
TUTORIAL 7
Start a new part file
Creating the second feature
Adding Cosmetic Threads
Creating Configurations Table
TUTORIAL 8
Creating the First Feature
Creating the Extruded surface
Replacing the top face of the model with the surface
Creating a Face fillet
Creating a Variable Radius fillet
Shelling the Model
Creating the Mounting Bosses
Creating the Vent Feature
Chapter 7: Sheet metal Modeling
TUTORIAL 1
Opening a New File
Constructing the Base Flange
Adding an Edge flange
Constructing the Miter Flange
Closing the Corners
Adding Corner Reliefs
Adding a Tab feature
Adding a Jog
Unfolding the bends
Creating Cuts across bends
Folding the Unfolded bends
Performing the Forming Operations
Making the Linear Pattern
Adding a Hem
Adding a vent
Adding Sheet Metal Gussets
Making a Fill Pattern
Chapter 8: Top-Down Assembly
Creating a New Assembly File
Creating a component in the Assembly
Creating the Second Component of the Assembly
Creating the third Component of the Assembly
Adding Bolt Connections to the assembly
Patterning components in an assembly
TUTORIAL 2
Creating Smart Mates
Creating the Limit Mate
Creating the Slot Mate
Chapter 9: Dimensions and Annotations
TUTORIAL 1
Creating a Model View with Center Marks
Creating Centerlines and Center Marks
Editing the Hatch Pattern
Applying Dimensions
Placing the Datum Feature
Placing the Feature Control Frame
Placing the Surface Texture Symbols
Additional Exercises
Exercise 1
Exercise 2
Exercise 3
Exercise 4
Exercise 5
Exercise 6
* توجه: کاربران نگران زبان انگلیسی کتاب نباشند. حتی کاربرانی که سر انگشتی زبان انگلیسی یاد دارند قادر خواهند بود از این کتاب بهره کافی را ببرند. لازم به ذکر است که یادگیری به همراه تمرین SolidWorks 2016 , Learn by doing-Part 1 در این کتاب به صورت قدم به قدم (Step to Step) همراه با تصاویر واضح و رنگی می باشد.

جهت خرید کتاب یادگیری به همراه تمرین SolidWorks 2016 , Learn by doing-Part 1 به مبلغ فقط 3000 تومان و دانلود آن بر لینک پرداخت و دانلود در پنجره زیر کلیک نمایید.
!!لطفا قبل از خرید از فرشگاه اینترنتی کتیا طراح برتر قیمت محصولات ما را با سایر فروشگاه ها و محصولات آن ها مقایسه نمایید!!
!!!تخفیف ویژه برای کاربران ویژه!!!
با خرید حداقل 10000 (ده هزارتومان) از محصولات فروشگاه اینترنتی کتیا طراح برتر برای شما کد تخفیف ارسال خواهد شد. با داشتن این کد از این پس می توانید سایر محصولات فروشگاه را با 20% تخفیف خریداری نمایید. کافی است پس از انجام 10000 تومان خرید موفق عبارت درخواست کد تخفیف و ایمیل که موقع خرید ثبت نمودید را به شماره موبایل 09365876274 ارسال نمایید. همکاران ما پس از بررسی درخواست، کد تخفیف را به شماره شما پیامک خواهند نمود.


نسخه 2016 SolidWorks شاهد تغییرات عمده ای بوده و همچنین شاهد این هستیم که بهبودهای متعددی جهت سهولت کار با این نرم افزار صورت گرفته است. گوشه ای از توانمندی های نرم افزار SolidWorks 2016 به شرح زیر می باشد:
*** در این نسخه از نرم افزار امکان باز کردن فایلهای STL پیچیده تر نسبت به گذشته با گزینه Solid و Surface وجود دارد (تا 500000 facets).
*** توسط دستور PhotoView 360 Scene Illumination Proof Sheet هنگام رندرینگ می توان در یک نگاه تاثیر تغییرات مختلف نور در محیط را بر رندرینگ نهایی دید و با استناد به آن عددهای درست برای تنظیم نور را انتخاب نمود.
*** در SolidWorks 2016 امکان منحنی C2 به Edge Fillet افزوده شده است. در نسخه قبلی این امکان تنها برای Face Fillet وجود داشت.
*** هم اکنون می توانید در هر نقطه ای از سطح یک صفحه مرجع موازی با نمای دید بسازید. برای این کار تنها لازم است در هر نقطه از سطح کلیک راست و گزینه Create Plane Parallel to screen را انتخاب نمایید.
*** در محل انتخاب شده یک 3D Sketch Point و یک Plane ایجاد می شود. می توانید 3D Sketch Point را نسبت به قطعه اندازه گذاری نمایید.
*** با استفاده از گزینه Circular Profile دیگر نیازی به رسم Sketch برای مقطع دایروی نبوده و تنها با انتخاب یک Edge از قطعه و تعیین قطر می توان Sweep را ایجاد نمود.
*** با استفاده از گزینه Equal Curve می توان طول یک خط و یا دایره در Sketch را برابر طول یک منحنی تعریف کرد.
*** بالاخره قابلیت Instant 3D به محیط Sketch وارد شد. اکنون با استفاده از Instant 2D می توانید ابعاد مورد نظر را با حرکت پوینتر ماوس تغییر دهید.

کتاب یادگیری به همراه تمرین SolidWorks 2016 , Learn by doing-Part 1، یکی از کتاب های مرجع، مفید و کاربردی در زمینه آموزش طراحی با نرم افزار سالیدورکس 2016 می باشد. این کتاب مشتمل بر 278 صفحه، به زبان انگلیسی روان، تایپ شده، به همراه کلی تصاویر رنگی، با فرمت PDF، به ترتیب زیر گردآوری شده است:
Chapter 1: Getting Started
Starting SolidWorks
User Interface
Quick Access Toolbar
Menu
Command Manager
Features tab
Evaluate tab
Sketch tab
Assemble tab
Drawing Environment tabs
Sheet Metal tab
Feature Manager Design Tree
Status bar
View (Heads Up) Toolbar
Shortcut Menus
Property Manager
Breadcrumbs
Mouse Functions
Customizing the Command Manager, Shortcut Bars, and Menus
Chapter 2: Modeling Basics
TUTORIAL 1
Opening a New Part File
Starting a Sketch
Adding Dimensions
Constructing the Base Feature
Adding an Extruded Feature
Adding another Extruded Feature
Saving the Part
TUTORIAL 2
Opening a New Part File
Sketching a Revolve Profile
Constructing the Revolved Boss
Constructing the Cut feature
Constructing another Cut feature
Adding a Fillet
Saving the Part
TUTORIAL 3
Opening a New Part File
Constructing the Cylindrical Feature
Constructing Cut feature
Saving the Part
TUTORIAL 4
Applying Draft
Saving the Part
Chapter 3: Assembly Basics
TUTORIAL 1
Opening a New Assembly File
Inserting the Base Component
Adding the second component
Applying Mates
Adding the Third Component
Checking the Interference
Saving the Assembly
Starting the Main assembly
Adding Disc to the Assembly
Placing the Sub-assembly
Adding Constraints
Placing the second instance of the Sub-assembly
Saving the Assembly
TUTORIAL 2
Creating the Exploded View
Creating Explode lines
Chapter 4: Creating Drawings
TUTORIAL 1
Opening a New Drawing File
Generating the Base View
Creating the Section View
Creating the Detailed View
Creating the Centerline
Specifying Dimension Settings
Retrieving Dimensions
Adding additional dimensions
Saving the Drawing
TUTORIAL 2
Creating a Custom Sheet Format
Starting a New drawing
Generating the Drawing Views
TUTORIAL 3
Creating the Isometric View
Generating the Exploded View
Creating the Bill of Materials
Creating Balloons
Chapter 5: Sketching
Creating Rectangles
Creating Polygons
Relations
Merge
Horizontal
Vertical
Tangent
Parallel
Perpendicular
Midpoint
Automatic Relations
Deleting Relations
Hiding Relations
Sketch Numeric Input
Replace Entity
Make Path
Path Length Dimension
Convert Entities
Midpoint line, Perimeter Circle, and Sketch Xpert
Ellipses
Partial Ellipse
Conic
Move and Rotate Entities
Rotate Entities
Copy Entities
Scale Entities
Trim Entities
Extend Entities
Offset Entities
TUTORIAL 1
Sketch Fillet
Sketch Chamfer
Mirror Entities
Stretch Entities
Circular Sketch Pattern
3D Sketch
Chapter 6: Additional Modeling Tools
TUTORIAL 1
Constructing the Helix
Adding the Reference Plane
Constructing the Sweep feature
TUTORIAL 2
Constructing a Revolved Cut
Constructing a Mirror Feature
TUTORIAL 3
Creating Sections and Guide curves
Creating another section
Constructing the swept feature
Constructing the Extruded feature
Adding Fillets
Shelling the Model
Adding the Indent feature
Adding Threads
TUTORIAL 4
Constructing a cylindrical shell
Adding a Slot
Constructing the Axis
Constructing the Linear pattern
Constructing the Circular pattern
TUTORIAL 5
Constructing the first feature
Constructing the Second Feature
Constructing the third feature
Inserting Holes
Adding Chamfers
TUTORIAL 6
Constructing the first feature
Constructing the Extruded cut
Making the Curve Driven Pattern
TUTORIAL 7
Start a new part file
Creating the second feature
Adding Cosmetic Threads
Creating Configurations Table
TUTORIAL 8
Creating the First Feature
Creating the Extruded surface
Replacing the top face of the model with the surface
Creating a Face fillet
Creating a Variable Radius fillet
Shelling the Model
Creating the Mounting Bosses
Creating the Vent Feature
Chapter 7: Sheet metal Modeling
TUTORIAL 1
Opening a New File
Constructing the Base Flange
Adding an Edge flange
Constructing the Miter Flange
Closing the Corners
Adding Corner Reliefs
Adding a Tab feature
Adding a Jog
Unfolding the bends
Creating Cuts across bends
Folding the Unfolded bends
Performing the Forming Operations
Making the Linear Pattern
Adding a Hem
Adding a vent
Adding Sheet Metal Gussets
Making a Fill Pattern
Chapter 8: Top-Down Assembly
Creating a New Assembly File
Creating a component in the Assembly
Creating the Second Component of the Assembly
Creating the third Component of the Assembly
Adding Bolt Connections to the assembly
Patterning components in an assembly
TUTORIAL 2
Creating Smart Mates
Creating the Limit Mate
Creating the Slot Mate
Chapter 9: Dimensions and Annotations
TUTORIAL 1
Creating a Model View with Center Marks
Creating Centerlines and Center Marks
Editing the Hatch Pattern
Applying Dimensions
Placing the Datum Feature
Placing the Feature Control Frame
Placing the Surface Texture Symbols
Additional Exercises
Exercise 1
Exercise 2
Exercise 3
Exercise 4
Exercise 5
Exercise 6
* توجه: کاربران نگران زبان انگلیسی کتاب نباشند. حتی کاربرانی که سر انگشتی زبان انگلیسی یاد دارند قادر خواهند بود از این کتاب بهره کافی را ببرند. لازم به ذکر است که یادگیری به همراه تمرین SolidWorks 2016 , Learn by doing-Part 1 در این کتاب به صورت قدم به قدم (Step to Step) همراه با تصاویر واضح و رنگی می باشد.

جهت خرید کتاب یادگیری به همراه تمرین SolidWorks 2016 , Learn by doing-Part 1 به مبلغ فقط 3000 تومان و دانلود آن بر لینک پرداخت و دانلود در پنجره زیر کلیک نمایید.
!!لطفا قبل از خرید از فرشگاه اینترنتی کتیا طراح برتر قیمت محصولات ما را با سایر فروشگاه ها و محصولات آن ها مقایسه نمایید!!
!!!تخفیف ویژه برای کاربران ویژه!!!
با خرید حداقل 10000 (ده هزارتومان) از محصولات فروشگاه اینترنتی کتیا طراح برتر برای شما کد تخفیف ارسال خواهد شد. با داشتن این کد از این پس می توانید سایر محصولات فروشگاه را با 20% تخفیف خریداری نمایید. کافی است پس از انجام 10000 تومان خرید موفق عبارت درخواست کد تخفیف و ایمیل که موقع خرید ثبت نمودید را به شماره موبایل 09365876274 ارسال نمایید. همکاران ما پس از بررسی درخواست، کد تخفیف را به شماره شما پیامک خواهند نمود.